Are you eager to start exploring the Meraki API, but don’t know where to start?
This article will help you understand what are the Meraki API and how’s Cisco Meraki leveraging them. It will also guide you through the first steps you’ll need to follow to get started with the API.
You can expect to have a much deeper understanding of the Cisco Meraki API by the time you’re done!
Cisco Meraki is an IT company at the forefront of cloud networking technology. They are currently the biggest provider of cloud-based networking hardware in the world.
Starting out as simply Meraki in 2006, the then start-up revolutionized how engineers think about networking as they introduced a solution built completely on the cloud, while also replacing outdated CLI’s with their modern dashboard.
Since its acquisition by Cisco Systems in 2012, Cisco Meraki has expanded massively to offer a wide array of cloud-based networking equipment such as wireless routers, switches, cameras, and more.
Cisco Meraki prides itself on the simplicity of its solution. Their slogan in fact is ‘Work Simple’. Network Engineers have been raving about the cloud platform for years now because of how easy it is to configure the hardware via the cloud.
As we know though, in the world of networking, things don’t always remain simple. Implementations can easily get complicated because of the diversity of user requirements. If Meraki began addressing all these complex cases and built-in functionality for each of them, then it would have to be at the cost of their simplicity.
This is precisely why Cisco Meraki has opened the floodgates to their dashboard with the APIs. They have invested heavily in enabling their APIs to be easily accessible by users. This means partners and developers can build unique solutions to address their special use cases while taking advantage of Meraki’s intuitive interface.
To understand the Meraki API, you’ll need to understand what APIs are first. The term API stands for Application Programming Interface, although this is probably no help in explaining what APIs are or what they do.
To explain simply without going into excruciating detail, an API is a medium used by computer programs to communicate with each other. By using APIs, new solutions can be programmed using existing tools.
Almost all the applications you use today utilize APIs, and you wouldn’t even know it. When you embed a YouTube video onto Facebook or LinkedIn, it’s done through APIs. When you find a place to go on Google and open the route in Google Maps, data is transferred from one application to another in the background through the power of APIs.
APIs allow users to develop applications that interact with their Meraki network infrastructure. By making API requests, data can be obtained from the Cisco Meraki dashboard.
In the case of Cisco Meraki, APIs allow users to develop applications that interact with their Meraki network infrastructure.
By making API requests, data can be obtained from the Cisco Meraki dashboard. This data can then be manipulated and updated on your Cisco Meraki cloud infrastructure using APIs. Through this process, Meraki users and engineers can build creative solutions on top of what is already offered by Cisco Meraki.
If you’re considering using the Cisco Meraki APIs, you should first examine what your use case is.
The core Cisco Meraki infrastructure offers much of the basic functionality you might need for simple networks, so it’s important to precisely outline the solution you are trying to achieve using the APIs.
Once you know your use case and you’ve taken a look at what’s currently possible on Meraki, you can more accurately determine how the APIs will come into the picture. You can harness the value of APIs for a variety of reasons such as Business Intelligence, Analytics, or Network Automation.
Often a task may be possible to finish directly on the Meraki dashboard without the use of an API, but the APIs can assist you with automating those tasks to avoid repetition and save you hours of time. For large deployments, this can be especially useful.
Once you’re familiar with the APIs you might find yourself using them every chance you get, which is why we recommend learning how to use them sooner rather than later.

The Meraki Dashboard API, as the name would suggest, enables you to access and alter the dashboard. This opens the door for developing monitoring, configuring, and deployment tools as you can now make changes to the Meraki dashboard itself using API calls.
Because the dashboard is at the center of much of what Meraki does, the Dashboard API is extremely powerful and is often considered the most powerful one because of the diverse potential of use cases it can be used for.
The Captive Portal API is aimed at addressing users who wish to change the way users interact with their wifi solutions via Meraki.
Using this API users can offer more advanced wifi. More authentication methods, customized splash pages, and the potential for Analytics tools are just some of the reasons developers like to use the Captive Portal API.
The Scanning API, often referred to as the Location Services API, is one of Meraki’s most special features. Through the Scanning API, real-time data about the precise location of devices connected to your access points can be sent to other applications.
Simply put, this allows you to get an estimate of where users within your site are currently located. The data obtained through this API can be extremely useful for marketing as it enables you to gain deep insights into how customers move through your location.
The Camera APIs are a suite of APIs built specifically for interacting with the Cisco Meraki MV products. Also called the MV Sense APIs, these can enable you to take more advantage of the data being collected by the cameras.
This API can be used to build more sophisticated analytics tools that can help you gain a better understanding of the data being collected by your cameras. The Camera APIs also enable you to design specific solutions into your Meraki camera using the power of computer vision and machine learning.
Although not exactly an API, webhooks work in a similar fashion and are often used for enhancing communication with your Cisco Meraki infrastructure. As an example, using this feature allows you to introduce webhooks for alerts pertaining to network statuses and configuration changes.
The tool can also be used to automate service ticketing and corrective actions and is a great asset to those looking to work more efficiently on Cisco Meraki.
When it comes to APIs, the only limit is your imagination! (Besides the availability of API touch points 😄).
Despite being miles ahead of the rest in the API game, Meraki has yet not made every single aspect of the dashboard accessible through APIs.
Don’t worry though, there’s still plenty you can do with what’s available! Let’s take a look at some of the common use cases we’ve seen for network automation.
Meraki does have a native bulk creation tool you can check out here. Unfortunately, the tool doesn’t enable you to deploy combined networks and isn’t too flexible, which means in many cases the native tool won’t be able to meet your needs – for instance, if you have more than one type of device on your network.
If you’d like to deploy multiple networks simultaneously, you can create a script that uses the Meraki dashboard API to help you with that.
If you want to push multiple configuration changes across multiple networks, there’s currently no easy way to do so on the Meraki dashboard.
You can use the Meraki templates, but it’s realistically unlikely that all your networks share the same configuration. Once you’ve bound a network to a template on Meraki, it doesn’t leave you with much flexibility for individual changes.
Fortunately, the Meraki dashboard API gives you a way to manage this. Through the APIs, you can change configurations across unique networks and push these changes at will.
The Meraki dashboard API can help you uplevel Meraki’s monitoring capabilities. For instance, the Meraki dashboard only allows you to see the devices and clients within each individual network.
What if you wanted to aggregate all the information from one (or multiple) orgs in the same place? The APIs are also there to help you, as they provide great benefits when it comes to troubleshooting.
The Meraki dashboard can be limited because it only allows you to search through MAC addresses, but you can use the APIs to parse through your networks using other information such as SSIDs or IP addresses.
And since we’re talking about troubleshooting, what if you could prevent some of those network incidents from ever even happening?
With the Meraki dashboard API, you can create systems to be notified whenever changes have been made to your networks that don’t comply with your defined golden rules. This allows you to stay ahead of the curve with greater network visibility!
To begin with the Cisco Meraki APIs, you must first have a Meraki dashboard account as that’s where it all begins. This dashboard is where you’ll be making your API calls to. So head over here to create or log in to your account.
Once you’ve set up your account or if you have one already active, you’ll need to enable APIs on your dashboard. To do so, simply go to the Organization tab and click on Settings. Here you’ll need to check the box that says Enable access to the Cisco Meraki Dashboard API.

Once you’ve enabled API access, you’ll need to get your API key. This is key as it lets Meraki know whose dashboard the API calls are communicating with.
To get your API key, click on your profile in the top right corner and head to My Profile. Once on this page, find and click the button that says Generate API Key to create your key. A pop-up will appear showing you the key that has just been created.
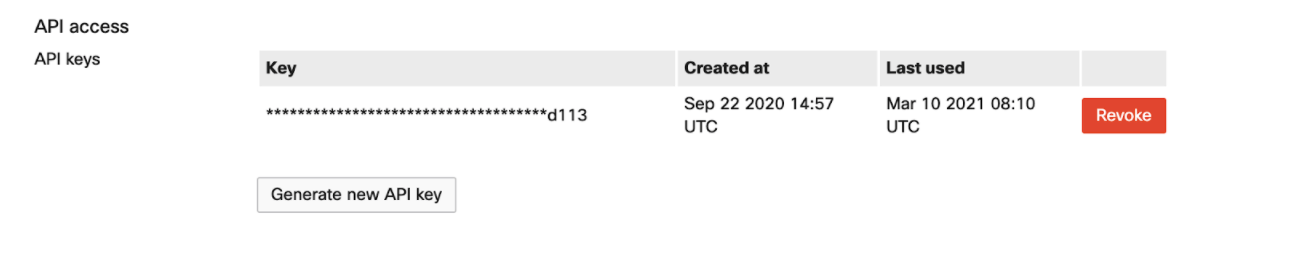
Many of those who came before you made the mistake of not saving their API key. Learn from their mistakes and be sure to store it in a safe place. You’ll be glad you did so later!
Although you can easily create a new key by coming back to this page, applications you create that were interacting with your dashboard will have to be reconfigured with the new key.
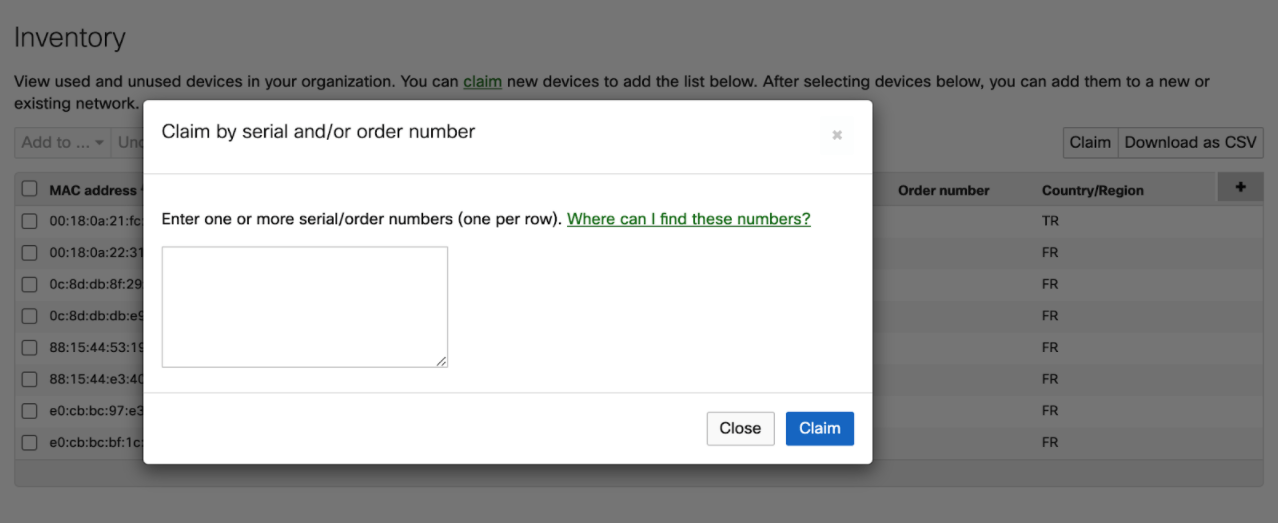
Certain API calls within Meraki can only be used with specific products. In order to use these calls, you’ll first need to claim the devices they can be used on. To do so, head over to the Organization tab and choose Inventory. Here you can claim your Cisco Meraki devices by entering their serial numbers, which can be found on the back of your device.
This step is essential as without actual devices your dashboard doesn’t have any real-world functionality.
Once you’ve completed all of the above steps you’re all set to start making API calls!
Before you embark on your API journey, you should definitely take a look at the Meraki documentation. This comprehensive documentation answers a lot of the questions you’re going to have along the way so make sure you bookmark it and go back to it every time you feel like you’ve hit a roadblock.
To actually make API calls you can either write Python scripts or use Postman. Both these tools fundamentally do the same thing but we recommend going with the latter because of how easy it is to use, particularly for beginners.
We’ll take a look at what Postman is and how we can get started using it to make API calls on Meraki.
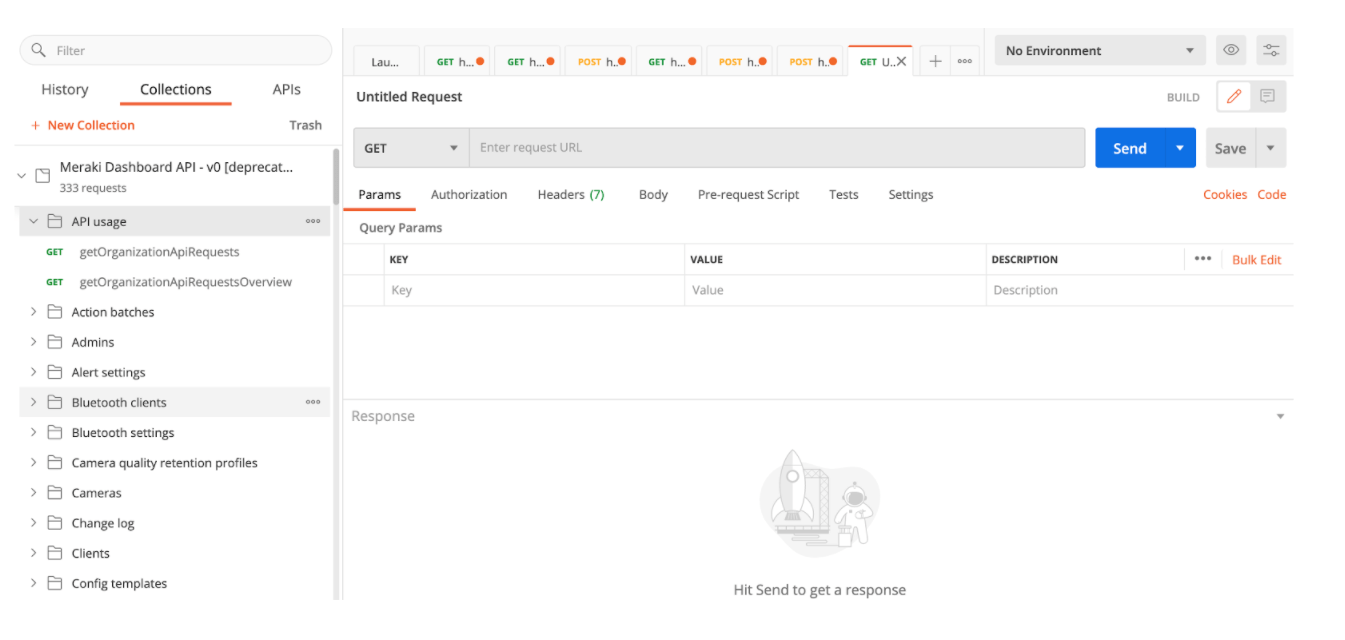
Postman is a graphical development platform aimed specifically at those who want to work with APIs. It offers a great collaborative environment and a host of tools and libraries that enable users to work on their projects more efficiently.
The API reference documentation for Meraki is provided in a postman collection that can be viewed here, This collection can be imported into the Postman application and even enables you to test your API calls, so you can see the effect of your application before you start using it.
By Clicking on the orange Run in Postman button on the top right of your screen, you can easily import the library into your Postman infrastructure. You’ll need to download the software to your computer or add the extension to your browser in order to be able to use Postman!

After you’ve downloaded Postman You’ll need to create an environment within it to get started accessing Cisco Meraki. Keep your API key handy as you’ll need it during this initial set-up.
The process of setting up your Postman account and making your first API call is explained in more detail in this article on Cisco’s website.
When you automate your Cisco Meraki networks, it is certainly possible to go on the mission alone. Although you do need to ask yourself if doing so is the best use of your time and focus. Especially when you have better options.
Building, testing, and maintaining API scripts is harder than it looks, which is why Cisco Meraki has an enormous ecosystem of API partners dedicated to building solutions on top of what they already offer. You can check them all out on the Meraki Marketplace.
Outsourced automation is certainly the way to go if you have a very complex use case and aren’t an expert writing your own programs.
The evolving landscape of the Meraki platform and API versions can make it difficult to keep up with the constant change, which is yet another reason for going with Meraki Partners.
Even when you can afford to do it yourself, often the need for network automation is simply one that cannot wait.
By partnering with experts and utilizing their out-of-the-box solutions, you can ensure you stay on track with your network management. There’s also an added bonus of having peace of mind that your automation process will go smoothly.
If you can’t find what you’re looking for on the Meraki Marketplace, there are plenty of solution providers out there who can custom-build something specifically for your use case.
As every organization runs into challenges unique to them, it’s not uncommon to need bespoke solutions that solve specific problems.
With over 7 years of experience working with the Meraki APIs, Boundless Digital has seen it all when it comes to automating Meraki Networks.
Our turnkey network automation platform allows you to do all the tasks mentioned above and much more. The solution allows you to easily harness the power of automation while also enabling you to build customized workflows, templates, and dashboards to meet all your Meraki needs!
What we’ve built is the result of thousands of interactions with Meraki customers. Yet to this day we constantly come across new problems which require new solutions. This is why we also work to develop bespoke solutions for unique situations which can only be solved through APIs.
If automation sounds like something you can benefit from, reach out to us.
You might be a little intimidated by all that you’ve seen here. Don’t worry, working with APIs is never straightforward and you’re not alone here. The Cisco Meraki Community and Reddit are very active with users asking questions all the time. You’ll find plenty of people there willing to help you out should you run into any problems. Just remember, the more you learn, the more you’ll realize there is to learn.
We hope that after reading this article you are better equipped for the journey. If you’d like some inspiration on the kinds of things you can achieve with APIs, check out our case study on how we used the Dashboard API to automate network management processes.
Maybe one day you’ll be on the other side of the table helping others learn how to work with the Meraki APIs.
Good luck!
P.S. We frequently release new tips, articles and use cases around the Meraki APIs. Sign up to our newsletter to receive this directly in your inbox!for
Get a deep understanding of how to automate low-value and redundant network operations using the Meraki APIs.
1207 Delaware Ave #552, Wilmington, Delaware 19806
Americas: +1 (347) 464-6510 - EMEA: +33 (0) 181 22 12 80
We are proud to announce the launch of our new brand identity, marking a significant milestone in our evolution. This rebrand reflects our commitment to continuous innovation, agility, and automation — always moving forward.